EAT YOURSELF WELL

Inspiration | Information | Recipes

  • Home
  • About
  • Recipes
  • Wellness Retreats
  • Sites We Love
  • Shop
  • Inspiration

Savory Sweet Butternut Squash Soup

February 4, 2018 by Jennifer Silverberg Leave a Comment

When it’s cold and wet outside (like today), I want comfort food with a kick … and this Butternut Squash soup, with its sweet and spicy flavor profile is really perfect. A light salad with a tarragon vinegar and oil dressing makes a perfect companion, clearing your palate and letting you rediscover the creamy warmth again and again.

And fair warning – it’s a “little” addictive … so it’s good that it’s super-simple to make.

Butternut Squash Soup - Eat Yourself Well

All the best flavors – sweet and spicy – in a creamy, delicious, healthy soup!


The Amazing Savory Sweet Butternut Squash Soup

-1 tbsp. coconut oil (Click here to cart my favorite!)
-2 shallots
-2 cloves garlic
-1 butternut squash, peeled and cut into chunks (5-6 c.)
-1 1/2 tbsp curry powder
-1/2 tsp. cinnamon
-salt and pepper
-1 can (14 oz) coconut milk
-2 c. vegetable broth
-2 tbsp maple syrup
-1 tsp. sriracha (or dry chili spice)


Click above to add these ingredients to your Walmart cart, or click here to choose other stores!

Choose your Favorite Retailer to Cart the Ingredients


1. Heat the oil over medium heat; once warm add the shallots and garlic (finely chopped) and sauté until light brown.
2. Add the squash and spices, stirring frequently over the next four minutes.
3. Cover and simmer over low heat (until squash is tender).
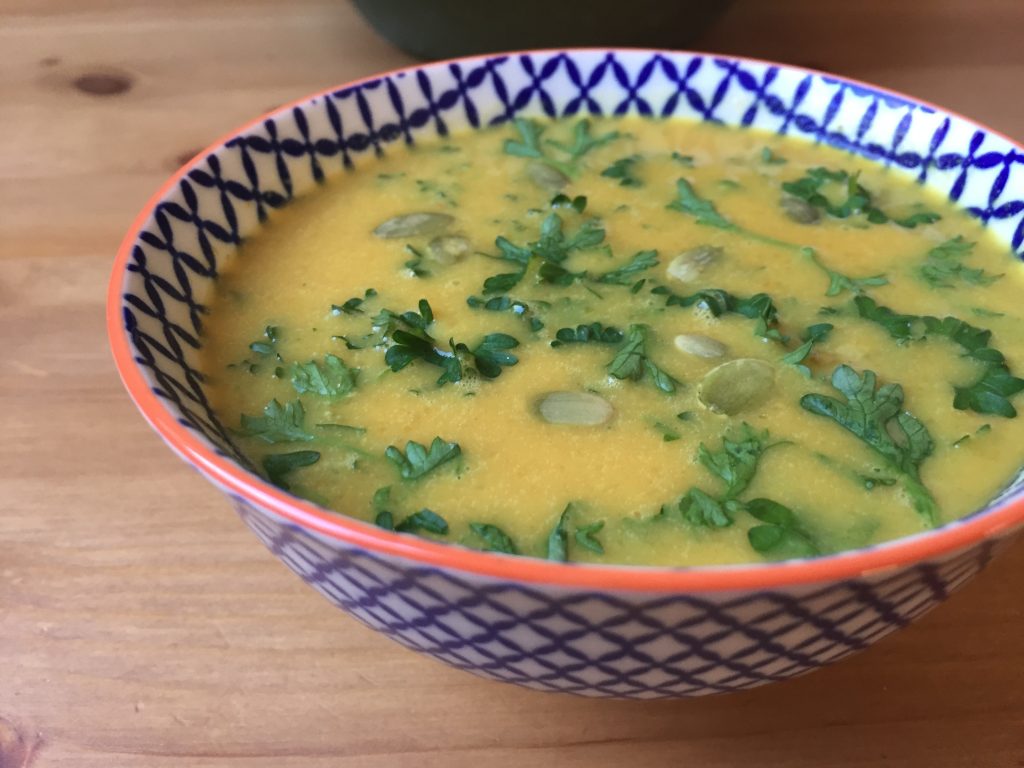
4. Blend with immersion blender, add more spices as needed over the next few minutes of simmering (just for a few minutes after blending it all together), then serve with desired garnishes. Pictured here with parsley and pepitas (crunchy texture is awesome to offset the creaminess!). Also very tasty with a bit of candied nuts.
Filed Under: Fast Recipes, Gluten-Free, Healthy Lunch Ideas, Recipes we LOVE, Seasonal Eating, Superfoods, Winter Recipes Tagged With: butternut squash, lunch, soup

Happy Healthy Birthday!

September 6, 2015 by Jennifer Silverberg 2 Comments

Healthy Birthday Cake

So, today is my birthday – one of the ones that end in “0” and cause you to pause to take stock of where you’ve been and where you’re going with the time you have left. This morning, I’m taking a few moments to give HUGE thanks to the body that has somehow been able to withstand all of the craziness I’ve thrown at it for so many years, and has provided a healthy, strong place to live through it all.

Of course, the LAST thing I want to do to celebrate this milestone is to violate myself with foods that will gunk up the works and negatively impact my health … so I’m making my own version of this “fruit cake!”

Totally wish you all could be here to share it with me – but here’s how to make your own!

Healthy Birthday Fruit Cake!

Ingredients
– One large seedless watermelon
– In-season fruits: melons, blueberries, strawberries, kiwi, pineapple, blackberries, dragonfruit, cherry, apple, bananas, pears, oranges, figs … anything!

Lay the watermelon on its side. Using a large, non-serrated, sharp butcher knife, cut both ends off to form parallel straight edges. Turn the watermelon so that it is sitting flat-sides up and down. Carefully slice within the rind to remove it, leaving a round form. If you’re anything like me, there is still quite a bit of cutting to do to make it even, but all of the trimmings are delicious!

Pro tip: place two plates (slightly smaller than the diameter of the watermelon) on either side of the cake – one on top and one on bottom, and use the plates as guides for your knife. Voila – perfect circle!

Arrange whatever fruit is fresh atop the cake and around the bottom. To make shapes, use a cookie cutter, and then use toothpicks to affix them to the cake (be sure to remove toothpicks from fruit before kids serve themselves).

Cover and refrigerate until ready to serve (serve same-day). For serving, it helps to have an additional bowl of fruit so that you can simply slice the watermelon and spoon the fruit from a bowl.

Filed Under: Healthy Lifestyle, Inspiration, Recipes we LOVE, Seasonal Eating Tagged With: healthy birthday, healthy cake, watermelon cake

Homemade Tomato Jam Crostini – with Lemon Ricotta

July 19, 2015 by Jennifer Silverberg Leave a Comment

My favorite season? Easy, tomato season. I wait for this all year … and when it hits, I’m the first to the Farmer’s market to buy beautiful slicing heirlooms, and then the last to the Farmer’s Market to buy up the scratched/dented/bruised tomatoes for sauces and jams, at a discount. Actually, I owe a shout out to the nice folks at Crystal Organic Farms who are nice enough to set aside their “seconds” for me each week now!

Last week, I decided to turn the bumper crop of beautiful Black Krims into a homemade tomato jam. I made a few different batches to play around with the ingredients and ratios, and this one produced the hands-down favorite!

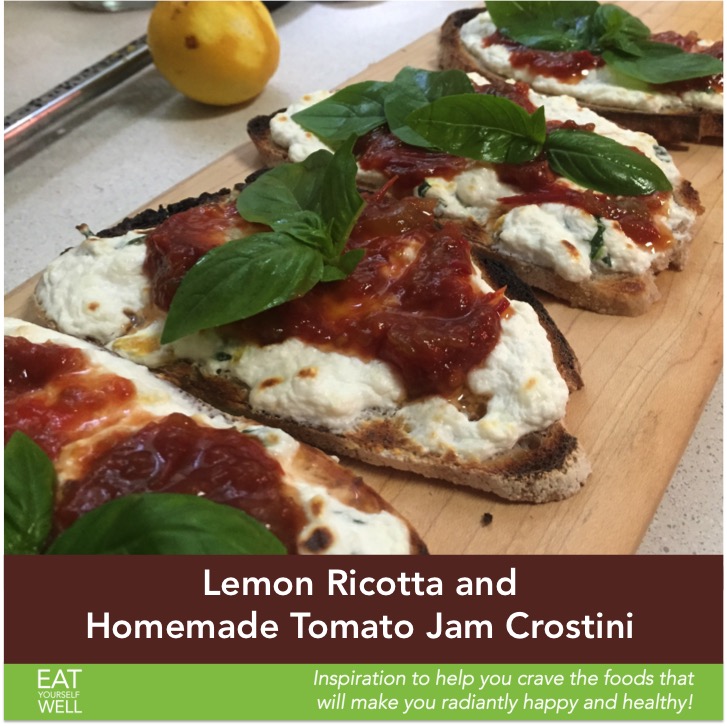
Tomato Jam Crostini

Lemon Ricotta and Homemade Tomato Jam Crostini

Fresh bread – whole wheat baguette or sourdough are my favorites – thinly sliced on the bias for 4-6 large slices
Fresh whole-milk ricotta – about 1/2 lb
Fine zest of 1 organic lemon
Homemade tomato jam (see recipe, below)
tiny pinch of salt
Freshly ground black pepper
Fresh basil, washed and torn by hand

Zest the lemon into the ricotta, add pinch of salt, and stir. If you can, let sit for 30 minutes or so to let the ricotta come to room temp and to give the lemon a chance to flavor the cheese.

Turn on broiler to start warming. On the stove in a seasoned cast iron pan, grill the thin bread slices on both sides (sure, you can just use a toaster, but grilling is tastier and just as easy!)

Spread the ricotta onto the bread slices and put under the broiler for a few minutes to let it warm and slightly brown. Remove from oven and spread the homemade tomato jam over the ricotta. Top with fresh ground pepper and torn basil to taste, and serve.

Homemade Tomato Jam

About 6 pounds of Black Krim tomatoes, with the cores and seeds removed (NOTES: I do this by coring the tomatoes and then squeezing them – some of the seed are left and I’m OK with that. Also peel them if you’re a purist – I usually just pull the skins out while cooking, and am not bothered if a skin or two is left.)
1 cup cider vinegar
5 garlic cloves, peeled and pressed
4 tablespoons grated fresh turmeric (substitute ginger if you don’t have fresh turmeric)
1/4 cup raw sugar
Grated zest and juice of 1 lemon (be sure to use organic since you’re using the peel)
½ teaspoon ground coriander
1 teaspoon red pepper flakes
1 teaspoon Kosher salt

Put all ingredients into a large pot (do not use uncoated cast iron). Bring to a simmer over medium-high heat then reduce to medium-low and cook, stirring occasionally (more often as it reduces), until jammy. Depending on how well you squeezed the tomatoes, this can take 3-5 hours.

To can the jam: ladle the jam into 3 hot sterilized canning jars, leaving ½ inch of headroom. Seal with hot lids and process the jars for at least 10 minutes.

To store for <1 month (it doesn't last anywhere near that long in my house): store in a covered glass jar in the fridge.Other usage ideas for jam:

Serve over warmed brie, feta, or pretty much any other cheese
Serve over quick-sauteed spinach, swiss chard, or kale
Serve alongside pretty much any egg dish, like quiche or omelettes
Serve on toast in the morning – delicious!
Stir into pan-sauteed fresh corn
Eat straight out of the jar (seriously)

Filed Under: Healthy Lifestyle, Recipes we LOVE, Seasonal Eating, Summer Recipes, Uncategorized

Sweet, Spicy, Savory Rainbow Chard Pasta

April 2, 2015 by Jennifer Silverberg Leave a Comment

This recipe will make chard-haters lick the bowl, I PROMISE. It has a flavor that is hard to explain until you try it … and it’s so easy, fresh, and healthy, you’ve gotta try it!

RainbowChardPasta

ingredients:
~ 1 large bunch multicolored rainbow chard
~ 2 tbsp. olive oil
~ 5 garlic cloves, crushed (you get more flavor and nutrition by crushing them!)
~ 3 tbsp. fresh rosemary, finely chopped
~ 1 tsp red chili flakes (more if you like it spicy)
~ 1 tbsp raw honey
~ 1/2 lemon, juiced
few pinches of sea salt, to taste
black pepper, to taste
pasta

How to Make:
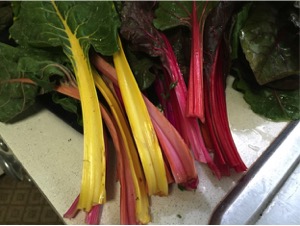
rainbowstemsWash and clean the chard. Fold the leaved in half, and using a small, sharp knive, separate the leaves from the stems. When done, take the stems and slice them in pieces about 1.5 – 2 inches long. Put the leaves in a rough pile (this doesn’t have to be perfect), roll them up, and slice crosswise into 1/4″ strips.

This dish looks so pretty because the stems and leaves are cooked separately, so the stem colors stay strong and they really pop on the plate. You can cook them at the same time in different pans, or one at a time, stems first, in one pan.

First, start your pasta (any kind, enough for 2). It can cook while you’re cooking the chard, but you’ll want it to be ready when the chard is ready.

stemscookingTo cook the stems: place them in a small pan with a few tablespoons of water, a bit of salt, and about 1/2 tsp olive oil. Bring to a boil and then turn down to simmer for about 10 minutes. Add just a bit of lemon juice when you’re adding lemon to the chard leaves, and toss.

garliccookingTo cook the chard leaves: add about 1.5 tbsp of olive oil to a large pan. Add the crushed garlic, chopped rosemary, red pepper flakes, a pinch of salt, and honey. Let cook on medium to medium-high for about 4 minutes until bubbly and just starting to think about browning. Add the chard strips and toss, letting cook for another 5 minutes or so, or until soft and tasty (yes, please taste as you go and correct the salt if needed!). About 2 minutes before it’s done, sprinkle the lemon juice over all and continue tossing. NOTE: the broth flavor in this recipe is AMAZING, so I usually make sure that it has a nice brothy bottom by adding about 1/4 cup of the water from the pasta along with the lemon juice, and cook it down just a bit.

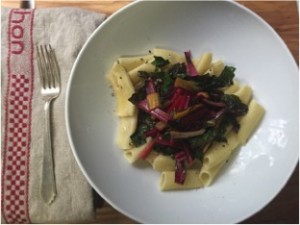
donePlate, starting with the pasta on the bottom, then a nice hearty serving of greens, then the colorful stems on top. Add fresh ground pepper, or not, to taste. Enjoy!

Filed Under: Recipes we LOVE, Seasonal Eating, Summer Recipes Tagged With: quick healthy meals, rainbow chard, rainbow chard pasta

Healthy Pumpkin Pie, Baked in the Shell

October 13, 2014 by Jennifer Silverberg 2 Comments

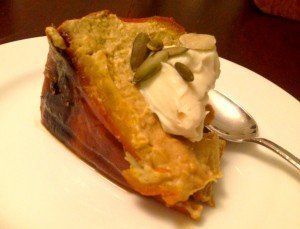
Pumpkin Pie Baked in the Pumpkin

Fresh Pumpkin Pie SliceOk, now THIS was a fun one to figure out! I wanted a fully REAL food pumpkin pie – nothing processed. And I wanted to bake it in the shell. And I wanted it to be fairly easy. Here you go: simple, healthy, and beautiful!

If you’re thinking of making this for Thanksgiving, you may want to make it once or twice ahead of time, too. Not because it’s tricky or anything, just because it’s delicious :-).

Ingredients
2 medium “Sugar Pumpkins” – these are NOT jack o’lantern pumpkins, they’re quite different. Look for ones marked “sugar pumpkins” or “baking pumpkins.”
1/2 cup maple syrup
3-4 tbsp “pumpkin pie spice” (or mix of cinnamon, nutmeg, ginger, cloves and allspice)
1 tsp salt
1.5 cup raw cashews
1 tablespoon vanilla
I also like to add some freshly ground nutmeg and a little fresh ginger if I have it on hand
Pepitas for garnish
Optional: 1/4 cup marscapone cheese – makes the pie super-creamy, but omit for vegan version
Optional: 2 eggs – they’re not needed, but some people prefer the texture of eggy pumpkin pie

How to make

Preheat oven to 350.

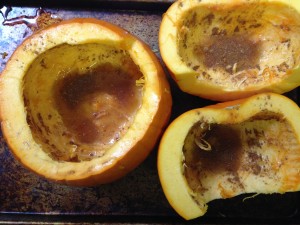
Cut the tops off of both pumpkins, and cut one in to halves, leaving the other whole. With a spoon, scrape out the seeds and other tissues and put aside (you can roast the seeds later if you like).

Pumpkin pieces ready to roastMix the maple syrup, spices, and salt, and pour into the “bowls” of the halves and the whole pumpkin, and spread around the inside surface. Place these on a large baking sheet and lay a piece of aluminum foil over all. Place into the oven – they are going to cook about 30 – 50 minutes (totally depends on the pumpkins, they can vary considerably), until softened but the shell of the large pumpkin is still solid (not collapsed).

Remove the pumpkins to cool. Put the cashews, a little water and vanilla in a high speed blender (like Vitamix) or food processor. Note: If you do not have a high speed blender, simmer the cashews in water for about 15 minutes, then discard the water before processing) Process until smooth, adding a little water as needed to make smooth. If you are using marscapone cheese and/or eggs, add them now.

When the pumpkin pieces are cool enough, pick them up and pour the remaining maple syrup/spices from them directly into the cashew mix and continue blending on low. Then, scrape the soft pumpkin pulp from the pumpkin halves, all the way to the skin (discarding skin), and add to the blender (still on low). Last, scrape about half of the pumpkin pulp from the whole pumpkin, leaving enough to preserve the structure, and also add this to the blender. Process until smooth. Note: you may overflow your blender, and have to blend in stages.

Taste the pumpkin mixture (assuming you haven’t added eggs) and adjust seasonings – I usually wind up adding some more spices at this point.

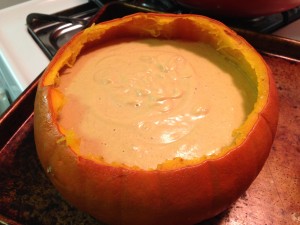
Pumpkin ready to go back into the oven

Pumpkin ready to go back into the oven. Note that the filling will expand a bit, so expect it to overflow if you fill to the edge.

When the filling is ready, slowly pour it back into the whole pumpkin, and put the “pie” back in the oven to bake for another 40 – 50 minutes or so, until the top is browned and the filling seems to be set. Remove, and let cool to room temperature, or place in the refrigerator to serve later (most people prefer pumpkin pie to be chilled).

I like to serve this topped with a little more cashew cream or marscapone, blended with a bit of maple syrup, plus a sprinkling of toasted pumpkin seeds. Slice from top to bottom and put slices flat onto plates, then top with the cashew cream or marscapone. Beautiful and delicious – Enjoy!!!

Filed Under: Holiday Cooking, Recipes we LOVE, Seasonal Eating, Superfoods, Winter Recipes Tagged With: healthy pumpkin pie, pumpkin pie baked in the shell, pumpkin pie from scratch, vegan pumpkin pie, vegan thanksgiving

Super-Healthy, Low Carb Potato Cauliflower Salad

September 7, 2014 by Jennifer Silverberg Leave a Comment

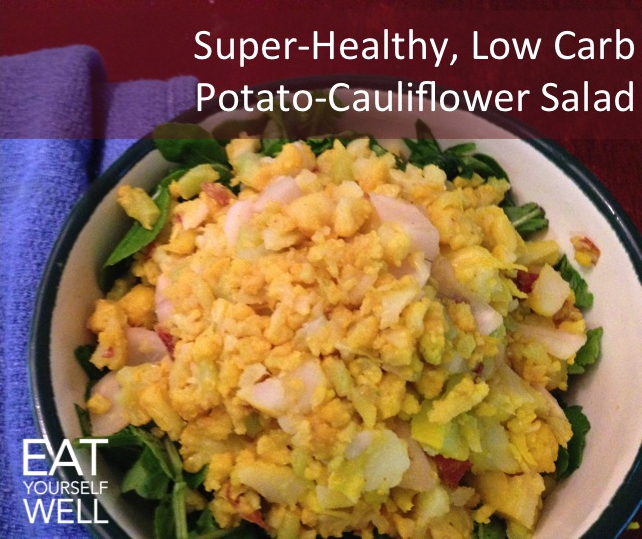
Potato Cauliflower Salad

If a picnic’s not a picnic without potato salad … but you’re avoiding overdoing the potatoes, not to mention mayonnaise … give this simple recipe with a healthy kick of turmeric a try!

Super-Healthy, Low Carb Potato Cauliflower Salad

Ingredients

1 large head of organic cauliflower, or two small ones
5-6 organic red new potatoes – medium-sized, like a small plum
2 cloves garlic
1 tbsp coconut oil
t tbsp turmeric
1 bay leaf
1 tsp salt
Ground pepper to taste
Arugula for base
Optional: Something pickled, like cucumbers or turnips

Cut cauliflower florets away from the stalk, and cut potatoes into about 6 pieces each. Peel and roughly chop the garlic. Add in a single layer to a 12″ fry pan, pour about 1/2 cup water over all. Add coconut oil, turmeric, and the bay leaf, then cover, and cook over medium-high heat until the veggies are almost fork-tender, about 10-15 minutes.

Remove lid and continue cooking until water is gone and potatoes are just beginning to break apart, about 4 more minutes. Remove from heat.

Note: everything will turn a lovely shade of yellow from the turmeric – that’s good, because it makes you feel like eggs have been added for a more traditional potato salad at the end. Also, when warm, this mix has a sort of voodoo loveliness and you’re going to want to eat it now … and that’s fine if you want a warm salad side … but keep going if you’d like a potato salad stand-in!

Put whole mixture (remove bay leaf) in fridge and let cool. When cool, chop into smaller bits – I love to use Toss & Chop salad scissors for this, but if you don’t have them, just use a good knife and break down the pieces so that they mix really well. If you like the taste of something pickled in your potato salad, chop it up and add it now, and maybe a teaspoonful or so of the brine also.

Plate the potato salad over some fresh arugula or other lettuce and serve! You’re eating mostly cauliflower, but your palate will taste potato. Add some fresh coleslaw for a fantastic summer picnic feast!

Filed Under: Gluten-Free, Recipes we LOVE, Seasonal Eating, Summer Recipes Tagged With: healthy potato salad, low carb potato salad, potato cauliflower salad, turmeric potato

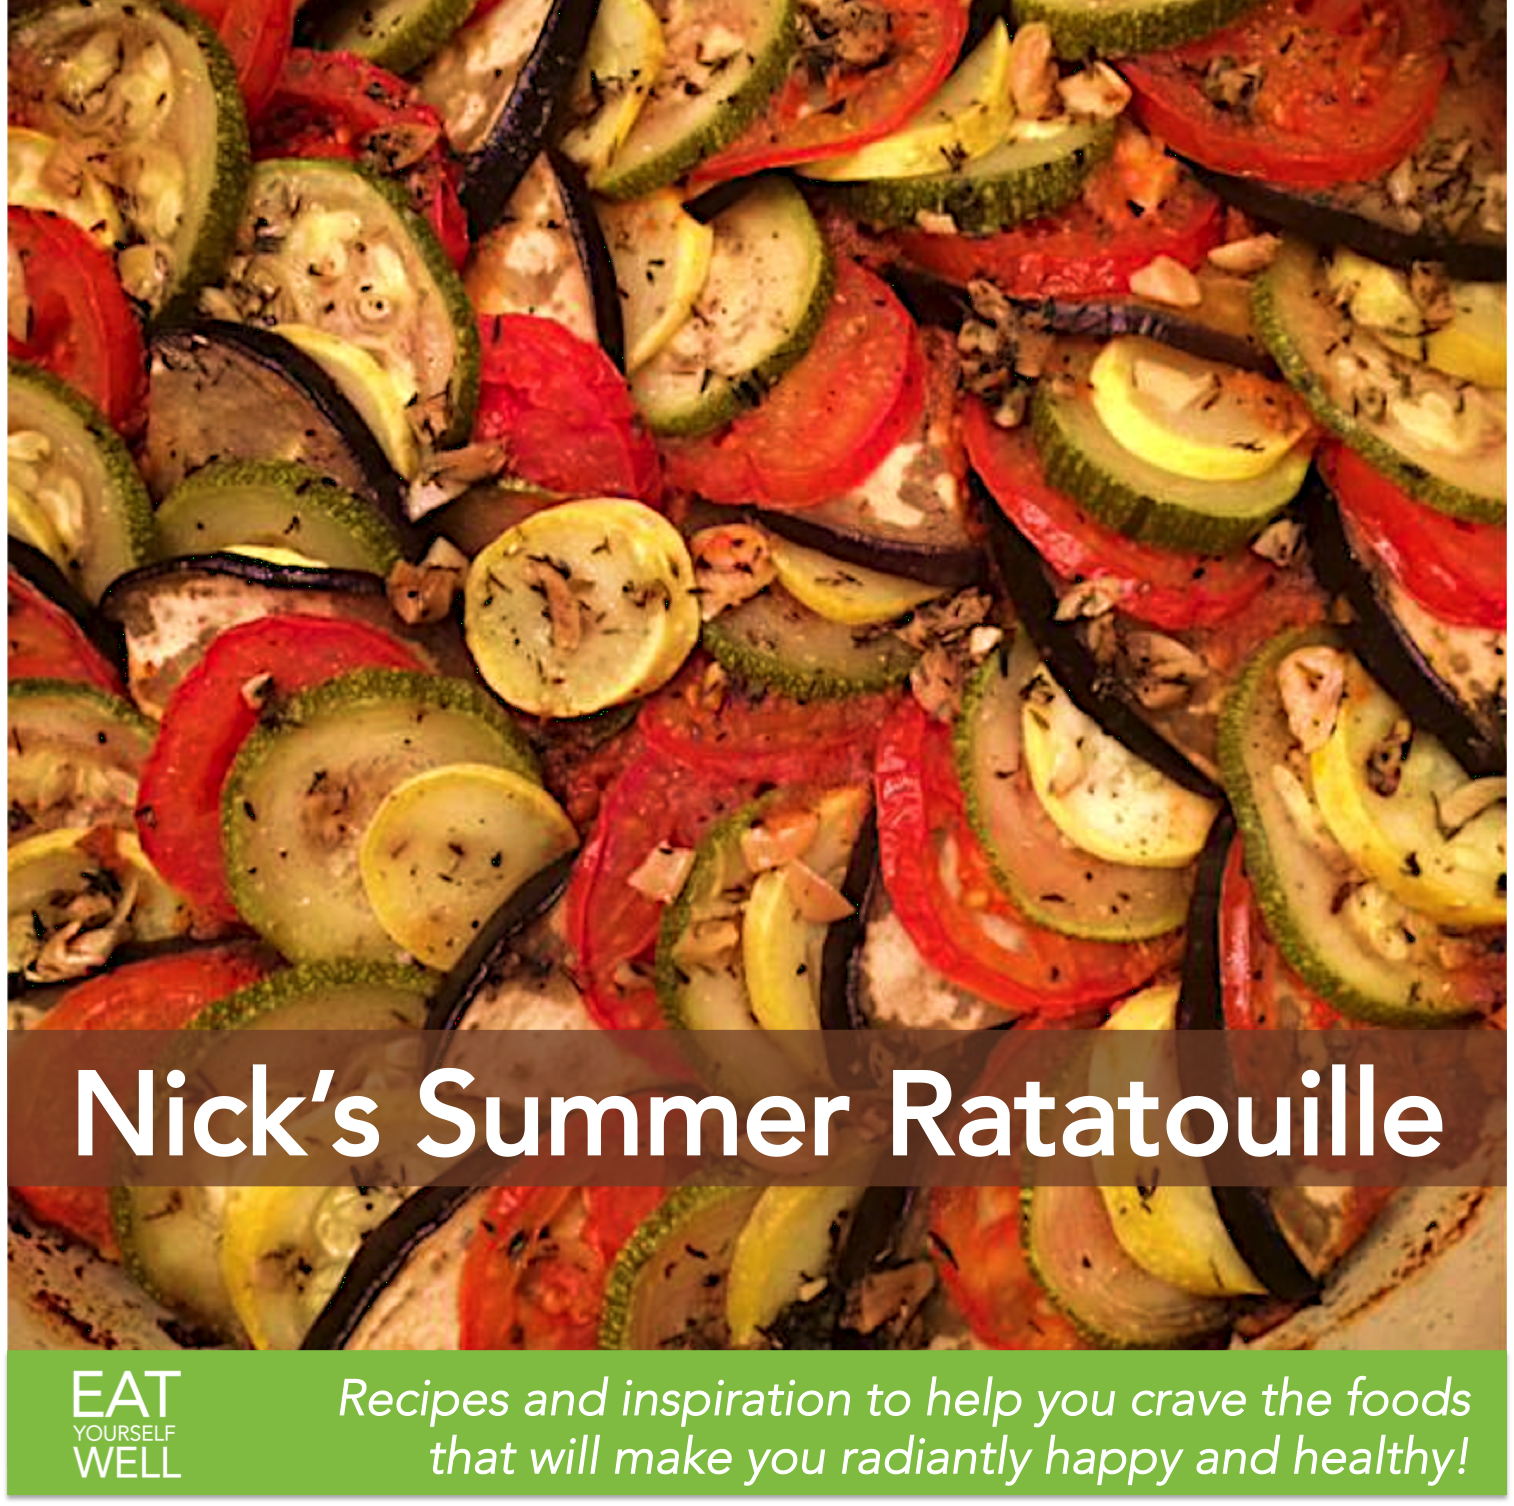
Nick’s Summer Ratatouille – Delicious!

September 4, 2014 by Jennifer Silverberg Leave a Comment

Nick's Summer Ratatouille

For me, it’s not summer without ratatouille … and I usually just take the shortcut of dicing and sauteeing the veggies, throwing on a few herbs along the way. However, this recipe was perfected by the young son of a friend – and it takes my “casual” version up about 5 notches! I think Nick has a future in the kitchen, don’t you :-)?

I love this hot or cold, as a side dish with just about anything, and it’s a great dish to take to a gathering – trust me, it’s so delicious that no one will realize that what they are eating is actually super-healthy!

Nick’s Summer Ratatouille

How to make:

Add to pan over medium heat:
1 onion, chopped
2 carrots, chopped
2 celery stalks, chopped
1 tsp butter (for a vegan version, eliminate butter and double the olive oil)
1 tsp olive oil

Cook for ten minutes.

Then add the following to this mixture, cook for three more minutes.
2 green chili pepper, charred, peeled, seeds and ribs removed.
1 clove garlic
salt (pinch)
pepper (to taste)

Next, add the following, cook until bubbling (stirring occasionally), then reduce temperature and cook for 20 minutes.
28 oz crushed organic tomatoes – be sure not to buy the kind with added sugar!
2 pinches of thyme

While the sauce is cooking, mix the following in a small jar or glass:
4 tbsp organic olive oil
2 tsp minced or crushed garlic
2 tsp thyme leaves, chopped
pinch of salt
ground pepper, to taste

When the sauce is ready, let it cool until it is safe to handle, then place in food processor with 2 pinches dried basil, or 5-6 leaves of fresh, and puree until thick. Pour into bottom of dutch oven or other large casserole dish.

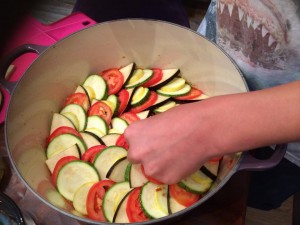
Ratatouille Layers

Nick adding layers of veggies.

Layer vegetables on top of sauce in dutch oven, starting with tomatoes, zucchini, squash then eggplant.
6 Roma tomatoes, sliced thin
2 yellow squash, sliced thin
2 zucchini, sliced thin
2 japanese eggplants, sliced thin

Gently and fairly evenly pour about half of the oil mixture over the vegetables.

Cook covered at 280 degrees for three hours. Pour remainder of olive oil mixture over dish, refrigerate until next day.

When ready to serve, warm for 45 minutes at 280, then drop to 225 degrees for another 45 minutes. Delicious served warm, or cooled.

Filed Under: Recipes we LOVE, Seasonal Eating, Summer Recipes Tagged With: Nick Wight, ratatouille, summer dishes, summer party

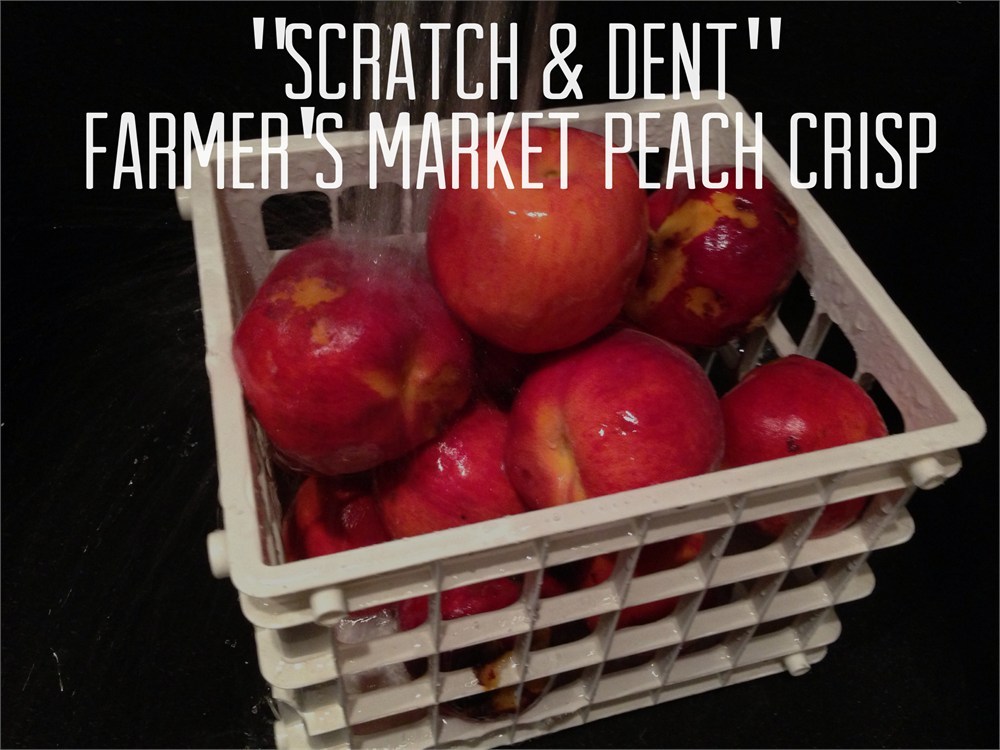
Farmer’s Market Peach Crisp

August 10, 2014 by Jennifer Silverberg 2 Comments

Farmer's Market Peach Crisp

Peaches are naturally juicy and sweet … so they need very little added to them to be amazing! Take this basic recipe and experiment all Summer – try adding a handful of raspberries … basil … even some grated ginger!

Buy organic peaches for your health and the health of our planet … and ask the growers at your farmer’s market whether they have any “scratch and dent” peaches with bruises or other imperfections. Not only are they a fraction of the price of perfect peaches, they’ll be the fruits that are ripe and ready to use when you get home!

Farmer’s Market Peach Crisp

Ingredients

6-10 medium scratch/dent (or other) peaches
juice of 1 lemon
2 tbsp coconut flour
1 tsp almond extract

1 cup whole oats
½ cup almonds
½ cup walnuts
1/4 cup unsweetened coconut flakes
½ cup brown sugar OR 1/4 cup maple syrup
1/3 cup melted coconut oil
pinch of salt

Preparation
1. Heat oven to 375 degrees.
2. Peel the peaches, remove any soft or bruised areas, and chop into about 4-5 slices per peach
3. Combine the peach slices with the lemon juice, coconut flour, and almond extract in a large bowl. Toss until the peaches are well coated.
4. Put the peaches into a casserole dish or lasagna pan.
5. Add the the oats, almonds, walnuts, and coconut flakes in a processor and pulse to break up into a coarse but fairly even mixture. Be careful here, don’t over-mix or you’ll wind up with nut butter!
6. Put this mix in your bowl, add the coconut oil, brown sugar, and salt, and mix with a spoon.
7. Place this mixture over the peaches.
8. Bake for 35-45 minutes, or until the peaches are bubbling and the topping is lightly browned.

Top with greek yogurt or a small scoop of high-quality vanilla ice cream.

Most important: sit and really ENJOY the amazing taste of summer … preferably sharing with family and friends who share your love of healthy, delicious food!

Filed Under: Healthy Treats, Holiday Cooking, Recipes we LOVE, Seasonal Eating, Summer Recipes Tagged With: farmers market peaches, peach crisp, peaches, summer peaches, ugly produce

A Perfect Food Principle from Alice Waters

July 17, 2014 by Jennifer Silverberg Leave a Comment

Alice Waters, on Real Food - Eat Yourself Well

Filed Under: Seasonal Eating Tagged With: Alice Waters, eat yourself well, Food Principles

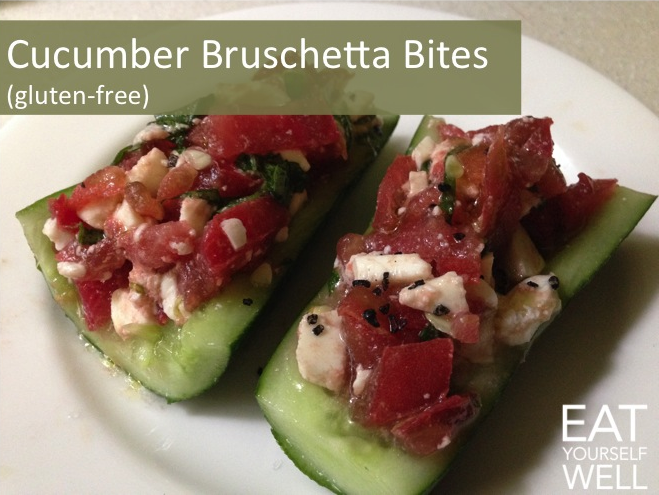
Cucumber Bruschetta Bites

July 16, 2014 by Jennifer Silverberg Leave a Comment

Cucumber Bruschetta Bites - Eat Yourself Well

Cucumber Bruschetta Bites

Do you love the taste and crunch of bruschetta, but want to avoid bread? Give this simple recipe a try – you’ll be surprised!

Ingredients

3 large organic tomatoes
3 oz mozzarella cheese
2 tsp organic olive oil
6-8 organic basil leaves
Salt and pepper to taste
Two large organic cucumbers
1 tsp balsamic vinegar (optional)

Directions

Slice the tomatoes and mozzarella cheese into a tiny dice, and place into a bowl. Slice basil leaves into thin strips, and add to the bowl. Sprinkle with olive oil, salt and pepper and set aside.

Slice cucumbers in half lengthwise, and again across, to make 4 pieces. Use a spoon to remove the seeds (Do not discard! Add to smoothies, or plant to get MORE cucumbers!) to make a cucumber “boat,’ or slice across the cucumber to make discs.

Pile the tomato mixture into the cucumber boats or onto the discs, and serve!

Filed Under: Fast Recipes, Gluten-Free, Seasonal Eating, Summer Recipes Tagged With: Cucumber bruschetta, eat yourself well, gluten-free, Jennifer silverberg

  • 1
  • 2
  • Next Page »

Are you ready to…

Lets get social


Want more? Follow us on social media.

Take a look around

Favorite Posts

Recent Posts

  • COVID Has Reminded Us: Health REALLY Matters
  • Amazing and Easy Banana Bread
  • Healthy Resolution!
  • Happy Healthy Christmas Salad!
  • Quick Comfort Food: Grits and Greens (Plant Based!)

Popular Posts

101 Fast/Healthy/Fabulous Snack Ideas

Copyright © 2023 · Foodie Child Theme by Shay Bocks · Built on the Genesis Framework · Powered by WordPress